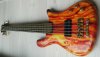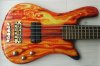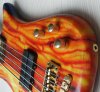

Streamer Pro-M refurbishing

Joined
Feb 11, 2012
Messages
39
Reaction score
0
If you like, read the story about refurbishing my Streamer Pro-M.

In spring last year, I bought this little beauty over the web. It was a little exiting, because I did not have the chance to check it personally. But the seller seemed to be a good guy and the price was worth the risk. The Streamer is made in Germany in 1998, got the bolt on neck from wenge, flamed maple body with almond burst finish. The Streamer came in a pretty used and unloved condition. There were several scratches on the body, screws for a midi pickup where poorly drilled in, the fretboard was full of mud from waxing and sweating and the whole hardware was poorly adjusted. But nothing was damaged, so it was exactly what I hoped for, an ideal base for a project.
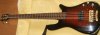
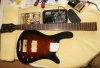
StreamerProM5_20120520_124626_1.jpg

StreamerProM5_20120520_124626_2.jpg
 
The Saddle:
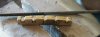
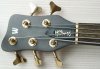
The Streamer came with a JAN II. I love the JAN I and now had to find one. Looking at the Warwick web shop kicked me off my shoes. They want about 80 euros for a JAN I and 120 for a JAN III Brass. Sorry Warwick, you are building nice pieces, but these prices are way-out. I remembered that the JAN I is constructed like the Webster Saddle, which was developed way back in the past. (I think in the 70’is, but don't know exactly). Web search and there was the Webster Saddle from ABM for 15 euros at the big T. The slots of the nut are not properly cut, but doing this on my own seemed to be a pleasure.

StreamerProM5_20120528_103526_1.jpg

StreamerProM5_20120528_125632_2.jpg

Thanks to Augie, I’m aware of the problem with the different sizes of JAN I and JAN II.
( warning?highlight=replacing)
I found a solution which works fine for me. I left the trussrod cover where it is and filled the gap with a small piece of felt.

StreamerProM5_20130319_120040_7.jpg

This was in spring last year, now in January I got one original JAN I on ebay for a few bucks. I’m happy to have one in stock for the next project.

By the way, I don't need the JAN II anymore. It's in good working condition, not broken, and I give it to you for just the shipping costs to your home. Drop me a PM and tell me your location -> I tell you the shipping cost -> you send me the money via paypal -> I send you the nut.
 
Yeah, nice job thus far. I installed some JAN I nuts on my Streamer LX Broadneck 6 and Artist Series Jack Bruce over Christmas as well. But for me, I pulled the trussrod cover off, filed the holes and moved the cover down to be flush with the thinner JAN I nut. It wasn't far, so there's really no way to tell that it was moved unless you're a couple inches from the neck and looking directly at the nut.
 
The Neck:
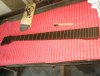
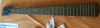
Cleaning the neck, pulling the mud out of the grain, wood and fret polish using a brass brush and steel wool grade 0000. I love wenge necks and after the cleaning it looks really nice.

StreamerProM5_20120526_133400_1.jpg

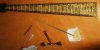
While working on the neck, I got the idea, to play with gold pigments to color the bass. So I rubbed the pigments directly into the grain and treat it with saflor oil several times.

StreamerProM5_20120819_155542_9.jpg

After all I polished the neck with Warwick wax. Got a nice slight shimmer.

StreamerProM5_20120819_173542_19.jpg
 
The Body:
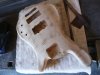
Man, this old Warwick lacquer is the hell, thick, hard, harmful. I appreciate my little Makita Grinder which stands these hours of nonstop grinding until the whole ♣♣♣♣ was off. And I like to thank my mate Peter, who gave professional sandpaper and other grinding stuff to me.

StreamerProM5_20120526_171402_2.jpg

In some cases instrument makers use opaque colors to cover wood defects or less quality woods. Same here, the maple is flamed mainly in the parts where they used the almond stain. The black color covers the more unattractive parts of the wood, several defects like little knotholes, wood cracks. Fortunately the defects are only around the lower horn. Taking up my idea to play with gold pigment, I fixed these defects as well as these poor drilled holes and some other dents by filling the holes with a tough paste from water base lacquer and pigment. Than it was prepared for the finish.

StreamerProM5_20120916_171726_9.jpg
 
The Finish:
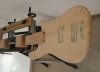
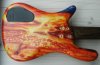
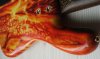
Doing the body finish was a real adventure. Without a real plan, I start to brush with colors I like, inspired by the wood, the weather, friendly smoke, beloved folks. It took me week’s, brush on - wash off, but it was a really great creative process. After that, I did the clear coat. 4 times 6 ply’s wet in wet water based lacquer with 20 micron sandpaper finishing in between. 2 times 6 ply’s wet in wet with 10 micron sandpaper finishing. Polishing with felt and car wax was the last step.

StreamerProM5_20130112_161524_2.jpg

To get the polished surface 100% i think i have to go over it once more with some more professional stuff, 3M finesse it white or so.
 
just to clear it up, the Warwick lacquer is strong and durable, not harmfull in itself while on the bass, just the dust is, if you sand it off.
 
Assembling, Adjusting, Playing
Putting all together and see how it looks altogether the first time was great.

StreamerProM5_20130319_120912_18.jpg

StreamerProM5_20130319_121052_21.jpg

StreamerProM5_20130319_121252_24.jpg

StreamerProM5_20130319_121744_32.jpg

StreamerProM5_20130319_122120_46.jpg

StreamerProM5_20130319_122552_60.jpg

Maybe I find the time later to take some higher quality photos and post some here to close the story.
 
I'm shocked. Bringing the bass back to life is tough but inspiring job. You've done it perfectly! Awesome!
 
Wow. Can't believe how well the paint mixed! How did you get that effect?
 
I've seen a lot of bad referbs, and this is definitely not one!!

Awesome job!
 
I am not sure about the pigments on wengeh, but man, I can't take my eyes of the body. It is hypnotic!
Awesome job, man!
 
Back
Top